In this article, we will explore numerous helpful tips and techniques for leveraging WhatsApp to enhance communication with your clients. We'll also delve into ways to ensure a smooth flow of meaningful data across your systems.
Allow me to introduce Sarah, a small business owner seeking to enhance customer interactions through automated WhatsApp messages. Luckily, she has come across PulpoChat, a versatile WhatsApp solution designed for teams. By utilizing the Make/Integromat automation platform, she can effortlessly connect various applications, including WhatsApp. Let's join Sarah on her journey as she discovers the power of PulpoChat and Integromat to automate her WhatsApp communication and revolutionize her customer interactions
Sarah owns a small business and understands the importance of personalized and timely communication with her customers. She wants to provide the best possible experience while also reducing manual efforts. That's where PulpoChat comes into play. It offers a powerful and intuitive solution for creating automated WhatsApp messages, making it the perfect tool for Sarah's needs.
Requirements
To achieve our tasks, we will need:
- A Google Account for Google Forms
- A PulpoChat account, sign up here
- A Make/Integromat account: sign up here
- Install the Make/Integromat app for PulpoChat: install app
Now let's follow the steps outlined below
Step 1: Install PulpoChat within Make/Integromat
After receiving the invitation link, simply click on it and log into your Integromat account.
Once logged in, you can easily install PulpoChat by clicking here, making it readily available in your account.
You will confirm the application is installed by checking in the Menu the installed Apps section

Now that the application is successfully installed, let's proceed with creating a new scenario.
Step 2: Connect a Google Form to get Contact information to process it in PulpoChat
Now, Sarah has a Google Form that she wants to integrate into her scenario. She plans to set up a connection that enables her to receive each form submission seamlessly. By utilizing the Google Forms module in Integromat, Sarah is ready to put her plan into action and witness the magic unfold.
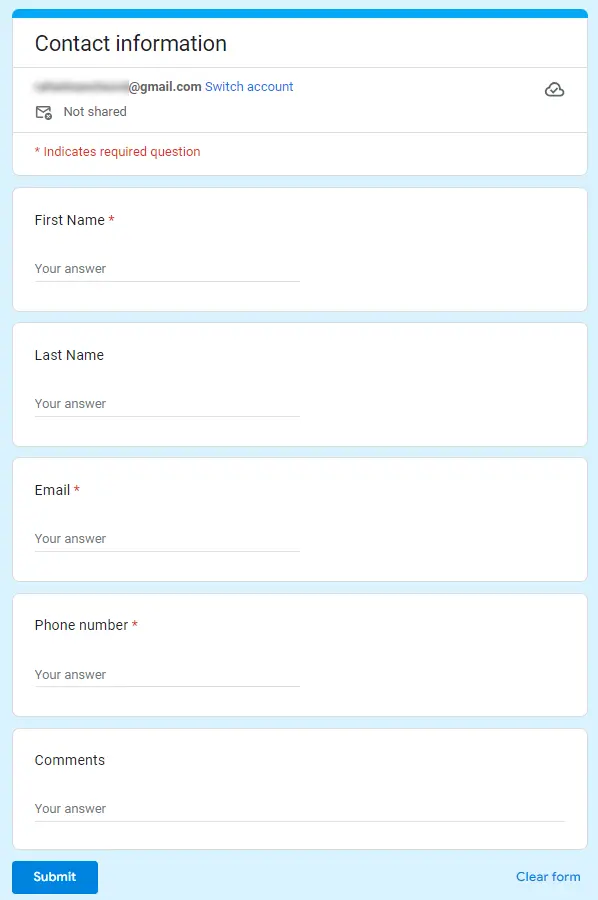
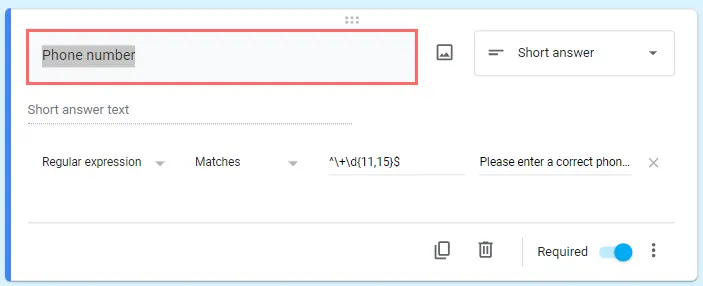
It's crucial to ensure accurate validations on the client side before sending information to our Make/Integromat scenario. Keeping this in mind, we've implemented a validation step in our Google Forms to verify whether the phone number is in the E164 compatible format.
We employ the following regular expression for this purpose: ^+\d{11,15}$ This is used in the phone number field of our Google Form as depicted in the image.
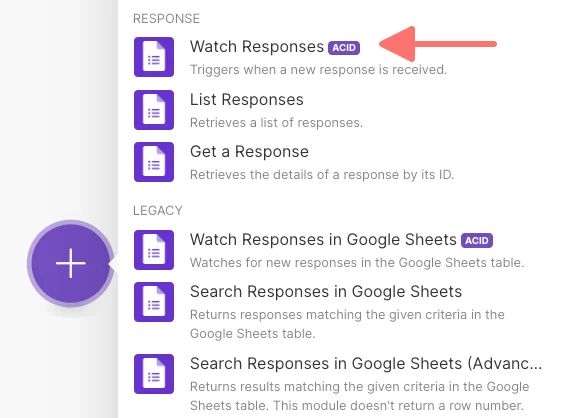
Now, let's incorporate the Google Forms module into our workflow. We'll select the "Watch Responses" event, which allows us to keep track of new form submissions, selection of the form is really simple just click the Search button and the list of your forms will show up.
In you new scenario click on the big Plus (+) sign in the purple circle, for easy finding write Google Forms in the search box and then chose Google Forms

Then Choose Watch Response
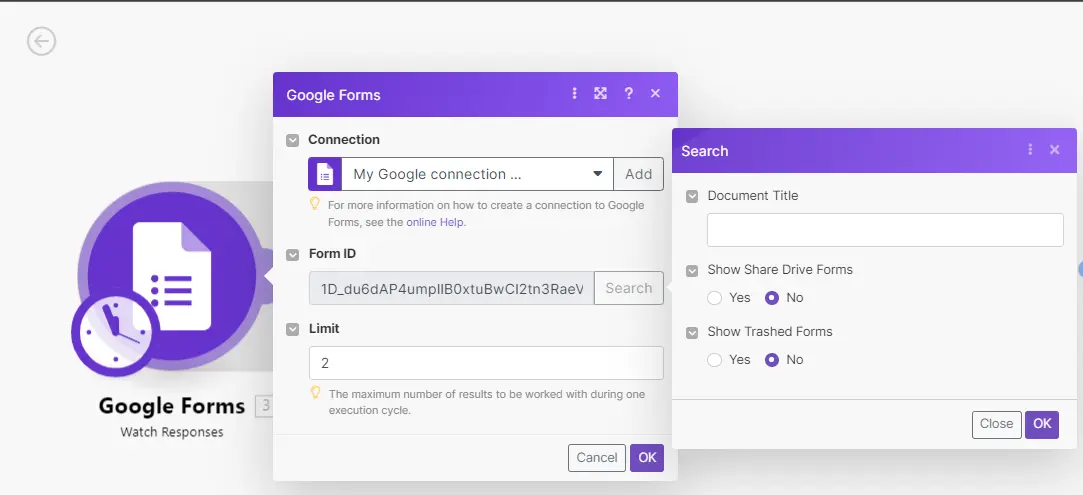
After you select the Trigger Watch Response option, a screen will appear allowing you to choose your form. In the Show Shared Drive Forms section, select 'Yes'. After you do this, a list of your forms will display. From this list, you can then choose the specific form you wish to use for your integration.
Additionally, we need to establish a connection with the Array Aggregator module. This step is crucial because, by using the Array Aggregator module, we can conveniently convert the collection of responses received from Google Forms into an array. This conversion will make it much easier for us to utilize the data in our upcoming steps.
Step 3: Test Google Form’s Submission
We're now going to test our form by filling it in and hitting submit. This action will trigger the 'Watch Responses' event in the Google Form module we've integrated via Integromat. The information submitted in the form will then be accessible for us to create a new contact in PulpoChat module we just added. Let’s examinate how the data is received
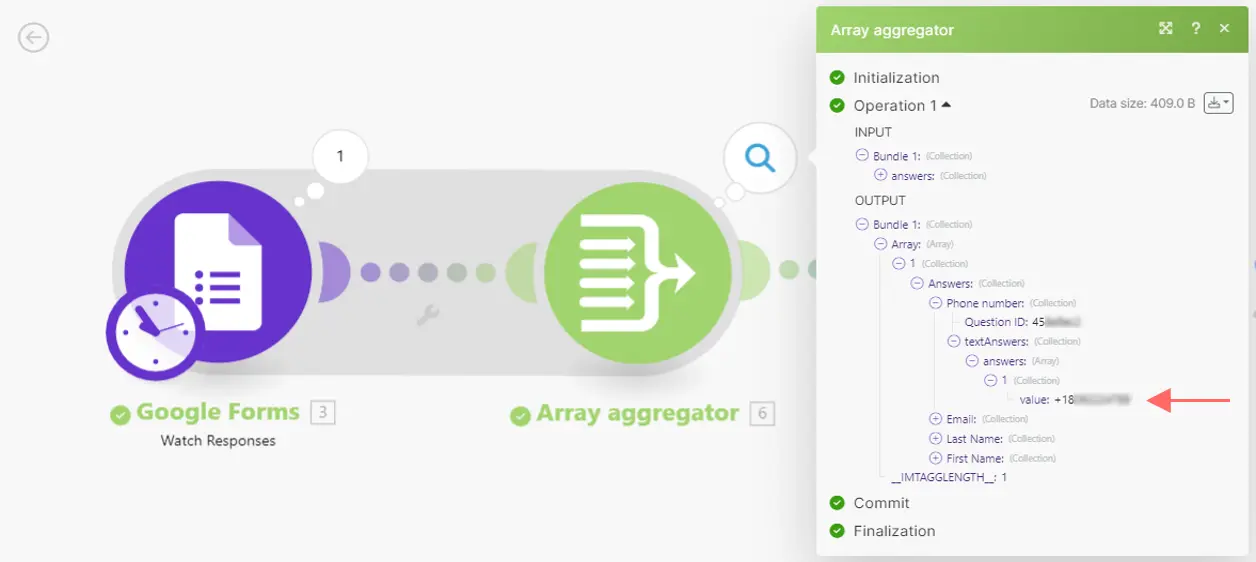
We'll examine the Array Aggregator Module to see how data is arriving from the Google Form as an array. This allows us to use these values in any following module. In our instance, we'll be integrating this data into the Create Contact event in the PulpoChat Module, next picture shows you how to configure the module.
After fill in the form run the scenario by clicking the Run Once button in the bottom:

Step 4: Connect PulpoChat within Make/Integromat
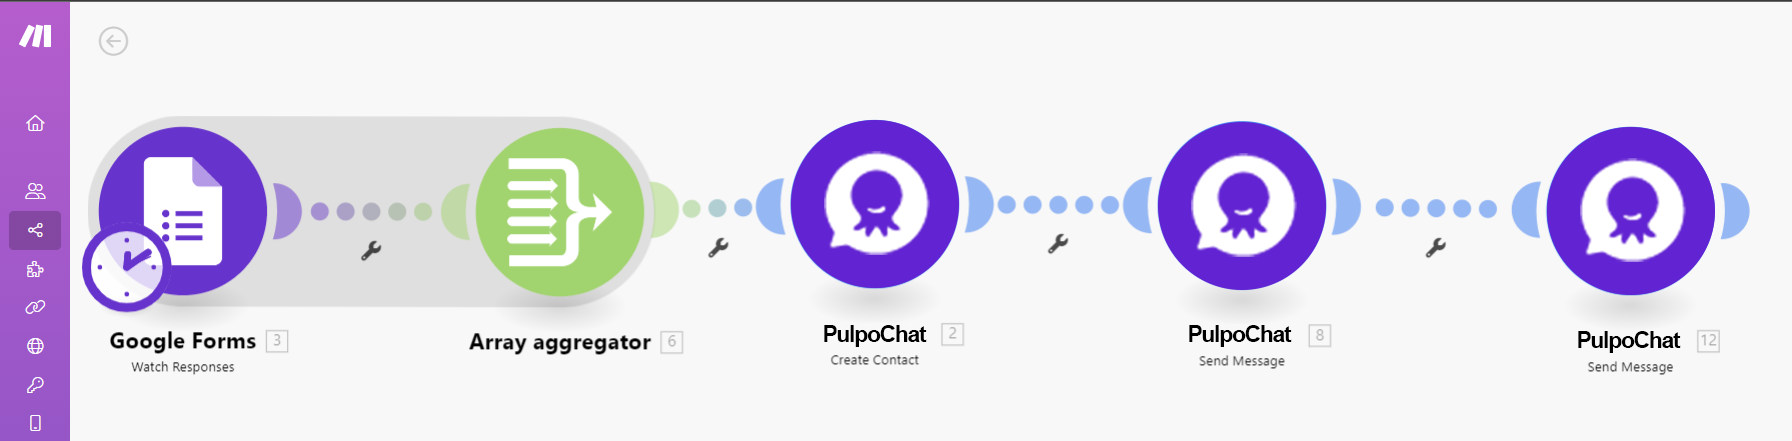
As PulpoChat is already installed in our Integromt instance we will add the PulpoChat module and the scenario is taking form, it should looks now like this
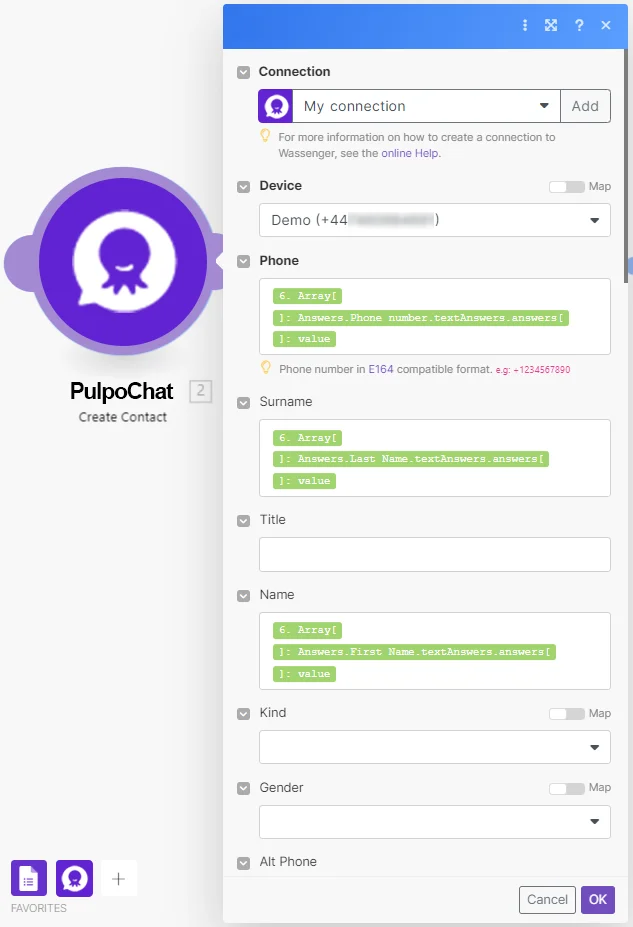
Let's connect the PulpoChat module and select the 'Create Contact' event. PulpoChat hosts a wealth of useful events that can enhance productivity and save time when creating scenarios with Integromat.
Please select the values from the Array Aggregator and place them in the corresponding fields in the PulpoChat module, as indicated in the provided image.
Before we run our scenario in full lets add another PulpoChat module and chose the Send Message event, our Scenario should now looks like this:
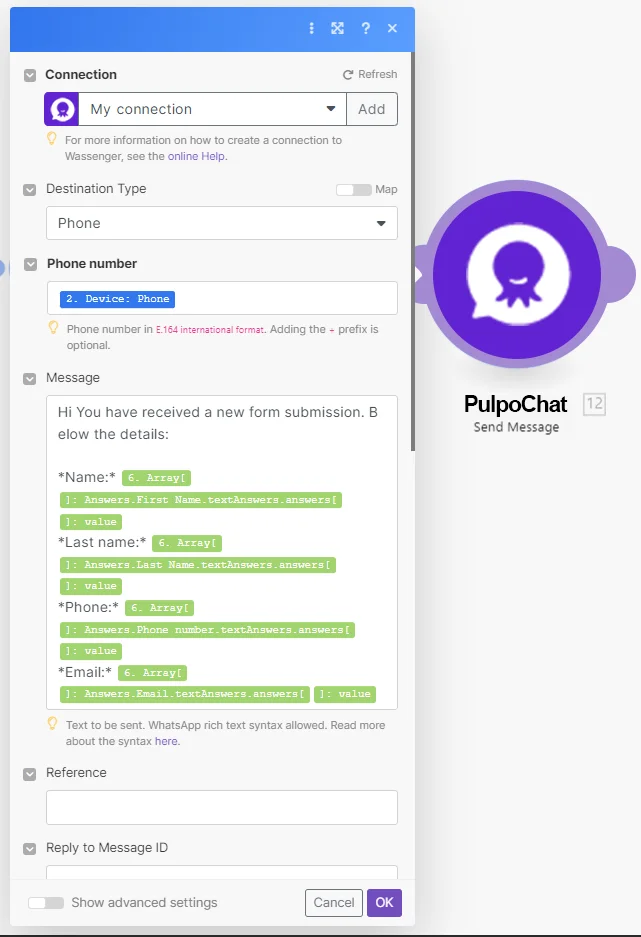
Step 5: Configure the Send Message event
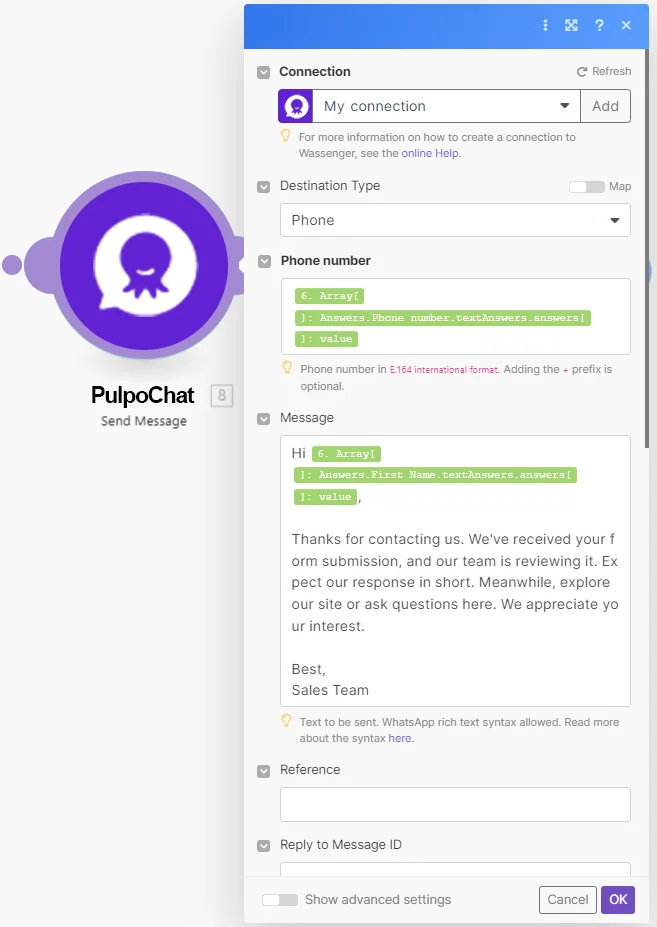
Sending a message is straightforward. We have access to plentiful information, which for now, we'll use to send a simple message to the client who filled out the form.
We'll pull the Phone field value from the Array Aggregator and draft a message. Also, by weaving in some information from the Array Aggregator into the message body, we can make each message feel more personalized for our clients.
Step 6: Send form information to your WhatsApp number
In this scenario, we'll walk through how to gather information that a user submits via a web form and send it as a notification to your WhatsApp number. It's important to note here that we're selecting our phone number from the PulpoChat Module Device section this allows us to use our own number, and then we'll craft the notification message using the information provided by the user through the web form.
Step 7: Test the Scenario
Now everything is in place lest test our escenario to validate the following:
- Google Forms Submission
- PulpoChat Contact Creating
- PulpoChat Send Message
- Send form information to your WhatsApp number
- Client receives the welcome message to the provided WhatsApp Number
Alright, let's jump in and test this out. Start by filling in the form using your mobile number. After submitting the form, we'll return to our Integromat scenario and run it again. Remember to hit the 'Run Once' button, then watch as the magic unfolds, almost instantly.
After the scenario completes its run, we'll see the number of operations each module has consumed, as indicated in Integromat.
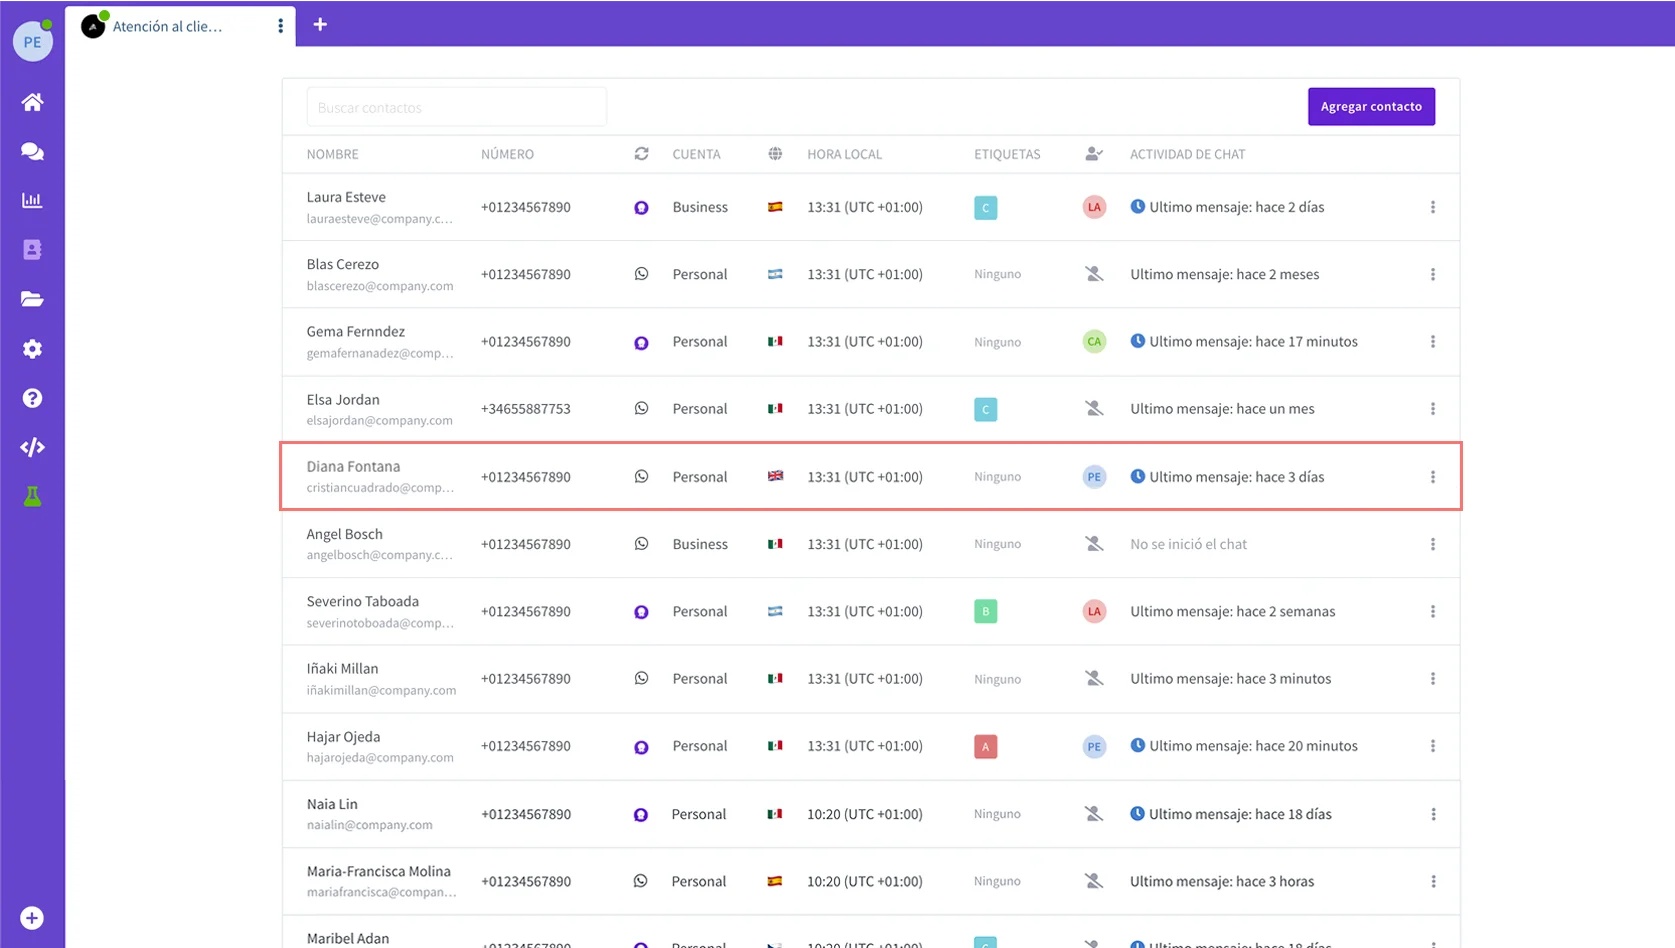
Let’s review PulpoChat and confirm the contact was created:
At the same time lets check out mobile and see the message in our WhatsApp.

Conclusion
Congratulations! By following the steps outlined above, you have successfully automated your form handling process using Google Forms, Make, and PulpoChat. With this integration, you can liberate yourself from manual data entry and communication efforts, allowing you to focus on more important tasks. Embrace the power of automation and explore the countless possibilities that Make and PulpoChat bring to your workflow. Start streamlining your processes today and unlock new levels of productivity.
Should you require advanced configurations, support, or professional consultation, rest assured that the incredible team of PulpoChat support and partners are always available to lend a hand. With great expertise, we are here to help you maximize benefits from the integration of PulpoChat with any third-party tool for any sort of automation.